Managing a WordPress website is hard work. Whether you’re selling something or simply running a blog, there is a ton of things you need to take care of. One of them is getting the WordPress featured image size right.
Like a great, captivating title, a captivating featured image can drive more people to click on your page.

To that end, picking the right size for your article’s feature image is crucial, as it affects the look and performance of your website.
Apart from sizing, this article will clear up any confusions you may have regarding featured images and give you some insight into how you can design your own featured image.
Let’s get started.
Table of Contents
What is the Recommended WordPress Featured Image Size?
The recommended size for a WordPress featured image is considered to be 1200 x 600 pixels. These dimensions work effectively for most blog formats and layouts.
Sticking to this image size will prevent any graphics you choose to incorporate in your blog from looking blurry or pixelated. This will also maintain a good level of functionality and performance of your website.
What’s the Point of a WordPress Featured Image?
Why do you even need a featured image?
As described earlier, a featured image works as a thumbnail image for any blog post type.
Adding a featured image to your blog post gives it a visual representation, which users can see to decide whether the article is relevant to what they’re looking for.
A relevant, high quality original image has the power to attract more visits to a website, landing page, or blog post.
It can also increase reader engagement, as well as the likelihood that people share a blog post.
What’s more – search engines can display these featured images in search results, which increases blog reach and the number of blog visits.
Apart from all the measurable benefits that a WordPress featured image adds to your blog post, it also makes the posts more visually pleasing.
A piece of writing that’s full of words with no visuals or graphics is an inefficient way of encouraging people to reading blog posts and website articles.
An example of this would be this blog post made by TransparentLabs
It includes using a featured image at the very start with the appropriate image of a woman with the product they’re marketing.
It sets the tone for the rest of the article that focuses on selling pre-supplement workouts.
This is something that you can take full advantage of when it comes to making your own blog posts to establish the reader on the rest of the article through the use of an image.
How to Set a Featured Image in WordPress
When on WordPress, scroll down on the tool bar on the right of your post until you find a section labelled ‘Featured Image.’
Clicking on ‘Set featured image’ will open up a pop-up window.
From here, you can select the image file you’ve chosen.

Once selected, your image will be displayed under the ‘Featured Image’ section of the toolbar.
How to Set Custom WordPress Image Sizes
When uploading an image onto WordPress, the software processes this image and provides users with some default image sizes (thumbnail, medium, and large).
These different sizes give users ease to select what they desire in different sections of the post.
You have the option for selecting images and their dimensions for thumbnail size, medium size, and large size images in ‘Media Settings’.
You can edit these image settings after uploading your media.

However, sometimes you may want to add images with custom sizes, such as when you’re adding new widgets to your website.
To do this, you’ll have to edit your website code.
Be sure to have a backup before proceeding with the following steps.
If you’re unsure about copying and pasting code snippets onto the WordPress site, we recommend you go through some tutorials on how to do so.
Step 1. Edit the Function.php file
In the WordPress website, go to ‘Appearance – Editor’ from your dashboard to edit the functions.php file and Write the following code into your file:
add_theme_support( ‘post-thumbnails’ );
You can replace the ‘post-thumbnails’ with whatever image you’re trying to add and
click ‘Save’.
This will enable the ‘add_image-size ()’ function. Then, add your custom images and sizes with this code:
add_image_size( ‘post-thumbnail size’, 800, 240 );
The numbers 800 and 240 are the dimensions (height and width respectively).
Step 2. Add the Code in Theme File
Once the sizes are added, you now need to display these sizes in the WordPress theme.
Add the following code in the post loop where you want the thumbnail to show:
<?php the_post_thumbnail( ‘your-specified-image-size’ ); ?>
Replace ‘your-specified-image-size’ with the name you used in the previous code.
Step 3. Regenerate Thumbnails
Changing the code doesn’t alter sizes for existing images in WordPress. You’ll have to update them to new image sizes.

The Regenerate Thumbnails plugin is a reliable and recommended plugin to use for this step.
After installing and activating it, go to Tools -> Regen. Thumbnails, and click the Regenerate All Thumbnails button.
This will regenerate all your existing images in WordPress to the custom sizes you had set.
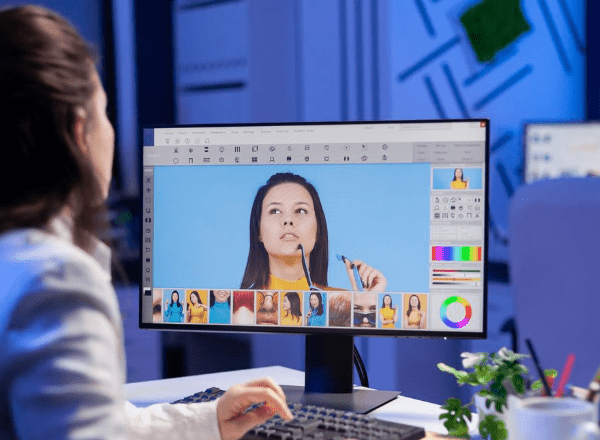
How to Design a Stunning WordPress Featured Image Using Pixelied
Now that you know the recommended size of a featured image, as well as why it’s important that your blog post has one, it’s time to create one from scratch.
But now you’ve encountered another problem: Where do you find one that’s most relevant to your post, and falls in line with the theme of your blog?
More importantly – how do you design one?
Enter: Pixelied.
What’s great about Pixelied is that you can edit each image and add various elements to it for added value.
Step 1. Open the Editor and Pick a Template
To get started, simply head over to our free editor.
In the left-panel, you can browse through a wide-selection of ready-to-use and fully customizable blog featured templates.
All of these are set at 1200 x 600 by default, so you don’t have to worry about the recommended dimensions.
![]()
Step 2. Start Customizing Your Featured Image
Even further left to that is a menu in which you can choose to add your desired images, text, illustrations or elements, shapes, and icons
![]()
You can edit any template to your exact liking.
You can choose millions of stock photos from the left sidebar. Type in keywords to get something close to what you have in mind.
After choosing your image, adjust it how you like by using the handy toolbar on the top of your workspace.
You can edit, crop, and adjust it to your liking.
Furthermore, you can also add custom copy and text styles to your new WP featured image.
![]()
You can also add fun elements, illustrations, and social media design icons to your featured image, while adjusting their colour and size to exactly how you want it.
Our advice? Keep the add-ons relevant to your blogpost – you don’t want your readers getting distracted.
How you design your featured image is all up to you. The Pixelied editor is designed to work efficiently, and easily – so don’t be afraid to play around and experiment.
Anything you accidentally delete can easily be recovered.
Step 3. Download!
When you think you’re done with your design, head over to the Download button on the corner right of the workspace.
![]()
Here you decide the image format you want to download your design, along with the desired quality and the size.
And that’s pretty much it.
Tips on Setting a WordPress Featured Image for your Blog
Here are some quick tips to help you nail your WordPress featured image:
Use the Recommended Image Formats
Does it really matter what your image format is?
If you want a non-blurry, high quality image on your blogpost, which doesn’t take hours to load on your reader’s browsers, the answer is YES.
Devices that are used to open your websites need to download the images for the user to see them.
Around 40% of users will leave your blog or website if this takes longer than 3 seconds.
Compressing your image is key to reducing its size so the device can download the image faster.
But, with compression comes a loss of quality.
The general rule of thumb is to choose a JPEG/JPG format for photos, and a PNG format for your graphics.
Only Use High-Resolution Images
The images you use to upload on your blog posts and website articles should be high resolution.
Readers open up these pages on many different devices – mobile phones, iPads, and large-screen desktops.
Your image should look clear and crisp on any of those devices.
For your blogs and websites to be considered professional, you’ll need to deliver on the quality front.
A high-res image that has margin to be scaled to full size and still look sharp is one of the key factors to keep in mind when choosing your featured image.
Keep it Simple and Relevant
The purpose of adding a featured image on your blog posts is to supplement the text with a relevant, visually pleasing graphic that encourages your readers to read further.
While it is important to make your image stand out and attract readers, they shouldn’t be too exciting.
The featured image should serve as an attractive add-along, not an element trying to steal the spotlight from the actual blog post.
Any image or graphic that is too cluttered, busy, and unclear will distract readers from the main text of your article.
The main takeaway here is to keep it simple, and relevant.
Final Words
Remember – with a captivating image, you can attract more traffic to your post, increase the likelihood of user engagement, and reap those SEO benefits!
Take some time to understand the tone of your website, blog post, or specific article, as well as what kind of an audience you’re attempting to attract.
This will help you pick out a relevant image.
It’s always a better option to design your own featured image, as you can customize it to accurately represent your brand. And, with a tool like Pixelied, it’s easy as pie.